Installing solar panels on a sloped roof can be a challenging task. This project requires careful planning and execution. According to solar energy expert Dr. Sarah Trevino, "Every sloped roof presents unique opportunities and challenges for solar panel installation." Her insights highlight the importance of understanding your specific roof conditions.
When tackling the question of how to install solar panels on a sloped roof, several factors must be considered. The angle of the slope directly affects energy efficiency. Moreover, proper mounting techniques are critical to ensure stability and safety. It's essential not to overlook the roof material and structural integrity.
This process is not without its pitfalls. Mistakes in installation can lead to leaks or reduced system performance. Understanding local regulations and securing permits is also crucial. Addressing these issues with care can lead to successful solar energy generation. With the right approach, your sloped roof can become a powerful asset in harnessing solar energy.
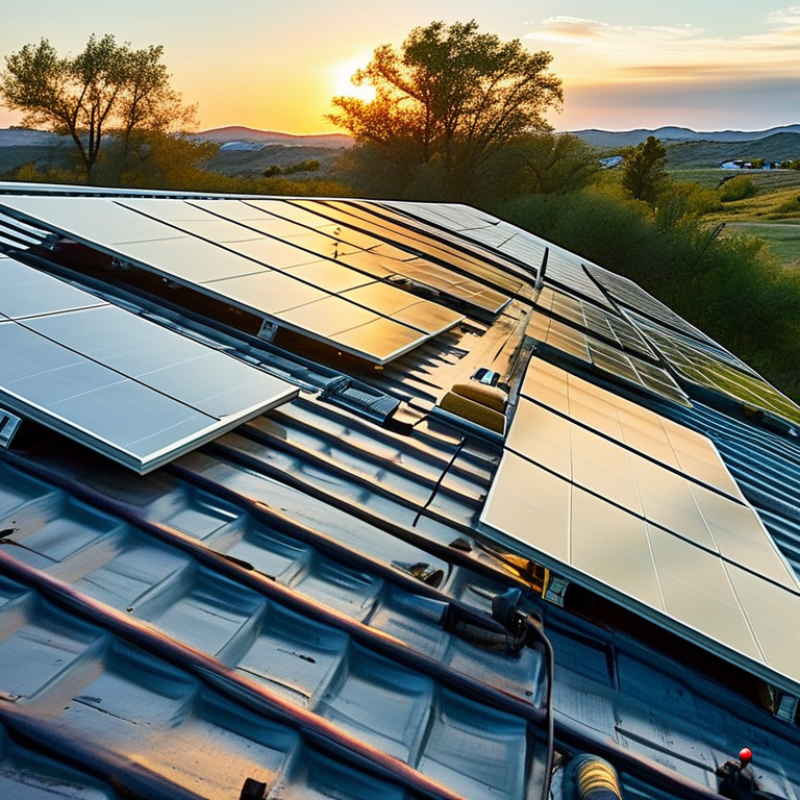
When considering solar panel installation on sloped roofs, understanding the structural requirements is crucial. A report by the National Renewable Energy Laboratory (NREL) indicates that sloped roofs comprise about 70% of residential buildings. Proper installation ensures optimal solar energy capture and system longevity.
One vital aspect is the roof's angle. Ideally, the angle should range between 30 and 45 degrees for maximum sunlight exposure. Structural integrity is essential. The roof must support the added weight of the solar panels, which can be around 2.5 pounds per square foot. Homeowners should also consider local snow load requirements, which can influence the choice of mounting systems.
Additionally, ensuring compliance with local building codes is necessary. These codes may vary widely, impacting installation techniques and safety measures. A lack of adherence could lead to fines or even removal of the system. Collaborating with local solar experts can help navigate these regulations effectively. Awareness of potential complications, such as drainage issues and shading from nearby structures, is also essential for long-term success.
When selecting solar panels for sloped roofs, consider the angle and orientation of your roof. Most rooftops have angles ranging from 20 to 30 degrees, which can impact solar efficiency. Photovoltaic (PV) panels are typically best suited for sloped roofs, as they can capture sunlight effectively throughout the day. Look for panels designed specifically for your roof type.
Tips: Choose panels with a robust frame to withstand wind and storms. Ensure they have a high efficiency rating, which reflects how much sunlight they convert into energy.
In addition, consider the material of the panels. Monocrystalline panels excel in performance but may require a greater initial investment. Alternatively, polycrystalline panels are budget-friendly but often less efficient. Make sure to assess the space available, as a smaller area may necessitate more efficient panels.
Tips: Consult with professionals for a proper assessment. Their expertise can guide you in finding panels that maximize energy generation. Be mindful of installation costs and potential maintenance needs, as these factors can affect your overall investment value.
Preparing a sloped roof for solar panel installation involves more than just securing panels. It requires a thorough assessment of the roofing materials and structure. Inspect for any existing damage. Look for signs of wear, such as missing shingles or leaks. If repairs are needed, address them before proceeding. A sound roof is crucial; otherwise, the installation might fail.
Next, consider the orientation and angle of the slope. This affects how much sunlight the panels will receive. Ideally, aim for a south-facing roof with an angle of 15 to 40 degrees. If your slope differs, you may need to adjust panel placement for optimal performance. An experienced technician can assist with this evaluation.
Clear communication with your installer is essential. Discuss any potential obstacles, like chimneys or vents, that could interfere with panel placement. Take time to reflect on the installation process. Mistakes can happen. Learning from these experiences can lead to a more efficient setup in the long run. Keep in mind the importance of professional advice. It can save time and ensure lasting results.
| Step | Description | Tools Needed | Time Required |
|---|---|---|---|
| 1 | Evaluate Roof Condition | Inspection Ladder, Flashlight | 1 hour |
| 2 | Remove Debris and Clean | Broom, Hose | 1-2 hours |
| 3 | Install Mounting Brackets | Drill, Wrench, Level | 2-4 hours |
| 4 | Attach Solar Panels | Screwdriver, Safety Harness | 3-5 hours |
| 5 | Electrical Connections | Wire Strippers, Multimeter | 2-3 hours |
| 6 | Final Inspection | Inspection Checklist | 1 hour |
Installing solar panels on a sloped roof requires careful planning. You must assess your roof's angle and material. Many sloped roofs use asphalt shingles or metal. Gather the right tools and secure proper permits before starting.
Begin by marking the locations for the mounting brackets. These brackets must align with roof rafters for stability. It’s crucial to drill pilot holes accurately. Use waterproof sealants to prevent leaks. This detail can save you from future headaches. Ensure the panels sit at the best angle for sunlight exposure.
Once the mounts are secure, attach the solar panels. A helper can make this process easier. Make sure the wiring is properly connected to avoid issues later. Remember, it’s okay to seek professional help if you're unsure. Achieving the right level of expertise takes time and practice. Each project teaches something new, even for experienced installers.
When installing solar panels on a sloped roof, maintenance and safety are crucial. The angle of the roof impacts water drainage and panel efficiency. The Solar Energy Industries Association (SEIA) reported that improper installation can lead to leaks and reduced system lifespans. Regular checks can prevent costly repairs and ensure longevity.
Routine maintenance is vital. Inspect connections at least twice a year. Look for dirt, debris, or any potential shading. This oversight can significantly affect energy production. It might seem small, but even a few inches of shade can reduce output by up to 20%, according to the National Renewable Energy Laboratory (NREL).
Tips for safety include ensuring proper anchoring of panels to withstand wind forces. A well-anchored system prevents panel displacement, a common issue on sloped roofs. Also, consider using professional services for installation to guarantee adherence to safety standards. Always wear safety gear when accessing your roof. It's not just about installation; ongoing diligence ensures a safe and efficient solar panel system.
: The ideal angle ranges between 30 and 45 degrees for optimal sunlight exposure.
The roof must support around 2.5 pounds per square foot for solar panel installation.
Local codes ensure safety and compliance; ignoring them could lead to fines or system removal.
Snow load requirements can influence the type of mounting systems used for solar panels.
Photovoltaic (PV) panels are generally the most effective for capturing sunlight on sloped roofs.
Consult professionals for guidance based on your roof type, efficiency needs, and budget.
Monocrystalline panels are high-performing but cost more; polycrystalline panels are cheaper but less efficient.
Nearby structures may cause shading, impacting the long-term performance of your solar panels.
Maintenance needs can vary; be aware of costs and requirements related to your chosen panels.
Evaluate all costs upfront, as they can significantly affect the overall value of your solar investment.
This article addresses the essential aspects of "How to install solar panels on a sloped roof?" by providing a comprehensive guide tailored for the year 2026. It begins with an overview of the necessary requirements for sloped roof installations, ensuring that homeowners understand building codes and safety measures. The selection of appropriate solar panel types is crucial; thus, the article reviews various options suited for sloped applications.
Furthermore, the article outlines the preparation steps needed for an effective installation, including assessing the roof's condition and surface. It then details a step-by-step installation process that homeowners can follow to mount solar panels securely. Lastly, maintaining the solar panel system is highlighted, emphasizing regular checks for optimal performance and safety to maximize the longevity and efficiency of the solar setup. This guide equips readers with the knowledge necessary to confidently undertake solar panel installations on sloped roofs.

Soltrux Solar