How to Safely Install Solar Panels on a Flat Roof in 2026?

Time:2026-09-23 Author:Ethan
0%

Installing solar panels on a flat roof can reduce energy costs, but the roof itself must remain safe, dry, and structurally sound. So, how do you answer the question, “How to install solar panels on a flat roof safely?” The process begins with a professional roof inspection, structural assessment, and careful design. Flat roofs often require ballasted systems, anchored frames, or a combination of both. Each option responds differently to wind, rain, snow, and roof movement.

PV safety specialist John Wiles offers a clear principle: “Safety must guide every design decision.” That principle matters when workers handle heavy panels near roof edges. It also matters when installers avoid unnecessary roof penetration. A qualified team should check load capacity, waterproofing layers, drainage paths, electrical bonding, fire access, and local installation requirements. Leave space around drains. Keep walkways visible.

Small details protect big investments.

The safest layout usually includes certified fall protection, stable access equipment, properly secured cables, and weather-resistant connectors. Installers should never cover vents, block maintenance routes, or place equipment where standing water collects. A licensed electrician must complete the electrical connections, testing, and grid integration. A roofing professional should review every attachment point.

Even experienced crews can overlook a minor issue, such as a loose cable rubbing against a metal bracket. That is why inspection records, photographs, torque checks, and post-installation monitoring are valuable. This guide explains practical steps for planning and installing a flat-roof solar system in 2026. It also recognizes an uncomfortable truth: the cheapest installation is not always the safest one.
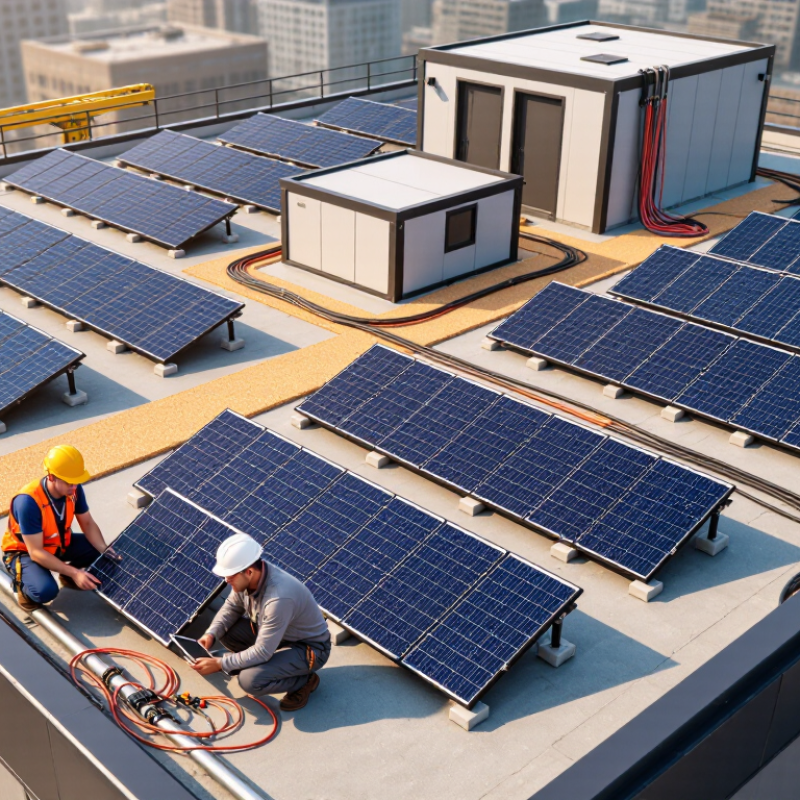
How to Safely Install Solar Panels on a Flat Roof in 2026?

Assess Flat Roof Structure, Solar Potential, and Safety Risks

How to Safely Install Solar Panels on a Flat Roof in 2026?

A flat roof needs more than a quick visual inspection. Check its age, membrane condition, drainage paths, and load capacity before planning a solar array. Solar equipment adds weight, wind forces, and maintenance demands. A structural engineer should confirm the roof can support these loads safely. Do not place supports over weak areas, ponding water, or hidden damage.

Solar potential also depends on nearby buildings, trees, roof edges, and seasonal shadows. A professional assessment should measure usable roof space and estimate annual sunlight, not just midday brightness. Leave clear access around drains and equipment. Local electrical and building requirements may also affect layout, cable routes, and emergency access. A perfect-looking roof can still produce disappointing results. That part is easy to underestimate.

Tips: Photograph the roof before work begins. Mark drains and fragile zones. Ask for a written structural review. Use approved fall protection and keep tools secured during windy conditions. Never walk on a roof surface without confirming its safe load rating. Inspect wiring for damage, water entry, and loose connections after installation. Even experienced teams can overlook small hazards, especially around roof edges. A second inspection is often worthwhile.

How to Safely Install Solar Panels on a Flat Roof in 2026?

Typical added dead-load ranges for flat-roof solar components. Actual structural capacity, ballast requirements, wind uplift, and snow loads must be verified by a qualified structural professional before installation.

Solar modules commonly contribute about 10–15 kg/m², mounting hardware about 2–5 kg/m², and ballast can add approximately 0–30 kg/m² depending on wind exposure, roof height, system geometry, and local design requirements. These values exclude existing roof layers, maintenance loads, and site-specific snow or water accumulation.

Check 2026 Permits, Building Codes, and Electrical Requirements

How to Safely Install Solar Panels on a Flat Roof in 2026?

Before any equipment reaches the roof, confirm the permits required by your city or county. Requirements can differ across neighboring jurisdictions. A 2026 permit package may include structural drawings, site plans, fire-access paths, and equipment specifications. Ask the building department which code edition it has adopted. Do not assume the newest national code applies automatically. A licensed professional should verify roof age, membrane condition, drainage paths, and wind-uplift resistance. Ballasted frames still add weight. Water pooling can expose a design mistake quickly.

The electrical review deserves equal attention. Check whether the installation requires a separate electrical permit, utility approval, or an interconnection agreement. The design should match the adopted 2026 electrical code, including conductor sizing, overcurrent protection, grounding, labeling, and required disconnects. Some jurisdictions also require rapid-shutdown equipment and clearly marked emergency pathways. The existing service panel may lack capacity. That detail is often missed during early estimates.

Keep roof penetrations away from drains and seal them with approved methods. Maintain clear working space around electrical equipment. On a hot afternoon, metal surfaces can become dangerously bright and slippery. Use fall protection, not improvised ladders or loose boards. A careful inspection should compare installed wiring with the approved drawings. Real projects rarely proceed perfectly; permit comments, hidden corrosion, or a weak roof deck can change the plan. Treat those findings as reasons to pause, revise, and obtain written approval rather than forcing installation forward.

Choose the Mounting System, Panels, and Roof Protection Methods

Flat roofs need a different solar plan. Water, wind, and membrane damage matter as much as electricity yield. IEA PVPS Trends 2024 recorded about 446 GW of new solar capacity in 2023, pushing global capacity beyond 1.6 TW. That scale makes careful rooftop work essential.

Choose an engineered aluminum rail system after checking roof structure, membrane type, drainage, and local wind conditions. Ballasted systems avoid penetrations, but add dead load and may increase wind uplift demands. Mechanically attached systems reduce ballast, yet every penetration needs compatible flashing and a documented waterproofing detail. A structural engineer should verify dead load, snow, and wind uplift using the applicable building code. Do not guess.

Select panels with strong efficiency, suitable temperature ratings, and verified mechanical-load data. IRENA’s Renewable Power Generation Costs in 2023 placed utility-scale solar near $0.044 per kilowatt-hour, about 90% below 2010 levels. Lower costs should not justify weaker installation decisions. Install walk pads along service routes, keep drains clear, and separate sharp hardware from the roof membrane. Use protection layers approved for the membrane chemistry. Leave access around vents and expansion joints. Small oversights become expensive leaks. I would also photograph every flashing point before covering it; records expose rushed work, including mistakes that seemed harmless.

How to Safely Install Solar Panels on a Flat Roof in 2026? - Choose the Mounting System, Panels, and Roof Protection Methods

Planning Dimension Typical Data or Range Recommended Selection Safety and Roof Protection Method Status Verification
Roof slope and drainage Flat roofs commonly have a low slope, often approximately 0–10°; many drainage designs use about 2% slope. Select a mounting system that follows the roof geometry without creating water-retention areas. Inspect drainage paths before installation. Keep roof drains, scuppers, overflow outlets, and inspection points unobstructed. Required Roof plan and site survey
Roof age and remaining service life A solar array is commonly planned for 25 years or more. Install only after confirming that the roof covering and insulation can remain serviceable for the intended array life. Repair or replace deficient roofing before mounting the array. Avoid installing over active leaks, blistering, ponding, or damaged membranes. Required Roofing contractor inspection
Mounting system type Ballasted, mechanically attached, or hybrid systems are commonly used on flat roofs. Use ballasted systems where roof structure, wind design, and roof warranty allow; use attached systems where uplift, height, or weight limits require direct fastening. Use a system engineered for the specific roof assembly. Do not choose ballast weight or anchor spacing from generic tables. Engineer Review Structural and wind calculations
Ballast loading There is no universal safe ballast value; the required mass depends on wind speed, building height, exposure, array geometry, roof friction, and local code. Use project-specific ballast calculations and the mounting-system installation instructions. Distribute loads with approved protective pads or load-spreading components. Confirm that concentrated loads do not exceed the roof deck or insulation capacity. Required Licensed structural professional
Mechanical attachment Fasteners and anchors must be selected for the roof deck, substrate, corrosion environment, and calculated uplift. Use tested, code-compliant attachment details compatible with the roof membrane and deck. Seal every approved penetration using the roof manufacturer’s compatible flashing and waterproofing detail. Do not rely on surface sealant alone. Required Roofing and structural review
Panel electrical rating Current crystalline-silicon modules commonly range from approximately 400–500 W, but output varies by model and size. Select modules certified to applicable photovoltaic safety and performance standards, including IEC 61215 and IEC 61730 where those standards apply. Confirm maximum system voltage, current, temperature coefficients, connector compatibility, and inverter operating limits before string design. Recommended Module and inverter datasheets
Panel size and roof layout A typical full-size module is approximately 1.7–2.0 m² and weighs about 20–25 kg, depending on construction. Lay out rows with adequate maintenance access, drainage clearance, edge setbacks, and fire-access pathways required by local rules. Do not place modules over drains, expansion joints, roof hatches, vents, or equipment that requires regular service. Required Scaled roof layout
Roof membrane protection Protection layers may include compatible walkway pads, slip sheets, separation layers, and load-spreading bases. Use protection materials approved for the specific membrane type, such as PVC, TPO, EPDM, modified bitumen, or built-up roofing. Prevent membrane abrasion, chemical incompatibility, punctures, and trapped moisture. Do not drag rails, ballast blocks, or modules across the roof. Required Roof membrane compatibility review
Walkways and maintenance access Required widths and routes vary by jurisdiction, building use, roof type, and fire code. Provide a continuous, visible route to inverters, disconnects, roof drains, equipment, and service areas. Use designated walk pads instead of allowing routine foot traffic directly on the membrane or between tightly spaced module rows. Required Local building and fire authority
Wind and snow design Design loads depend on local wind speed, snow load, exposure, roof height, parapets, tilt angle, and array position. Design to the locally adopted structural and loading codes rather than using a fixed nationwide value. Pay special attention to roof corners, perimeters, parapet zones, snow sliding, and drift accumulation. Required Site-specific engineering
Electrical grounding and bonding Exposed conductive frames, rails, and equipment require an approved grounding and bonding method. Use listed bonding components and conductors sized according to the applicable electrical code and fault-current calculation. Maintain continuity across module frames and rails; protect conductors from sharp edges, standing water, UV exposure, and mechanical damage. Required Electrical inspection
Rapid shutdown and disconnects Many jurisdictions require rapid-shutdown functions and clearly accessible photovoltaic disconnects. Follow the electrical code adopted at the project location and coordinate module-level or array-level equipment with the inverter. Label disconnects and circuits clearly. Keep equipment accessible without stepping on unsupported membrane areas. Code Dependent Local electrical authority
Roof penetrations and expansion joints Every penetration increases waterproofing risk; expansion joints must accommodate independent roof movement. Prefer non-penetrating designs where technically suitable, or use engineered flashing details for penetrations. Never bridge an expansion joint with a rigid rail or waterproofing detail that prevents movement. Photograph and document each penetration. Verify Carefully Roofing professional
Installation weather conditions Membrane adhesives, coatings, and sealants often have temperature, humidity, and surface-dryness limits. Install according to the roofing material and mounting-system manufacturer’s environmental limits. Do not install on wet, icy, contaminated, or excessively hot surfaces when the product instructions prohibit it. Recommended Product installation instructions
Final inspection and documentation A complete record should include drawings, structural calculations, wiring diagrams, torque records, photos, and equipment data. Schedule roofing, structural, electrical, and fire inspections where required. Record drain access, membrane condition, ballast locations, penetrations, cable routes, and commissioning results for future maintenance. Required Project closeout package
Planning note: Actual requirements depend on the roof assembly, building structure, climate, local building and electrical codes, fire regulations, and the instructions for the selected mounting system and roofing materials. All ballast, attachment, waterproofing, and electrical designs should be reviewed by appropriately qualified professionals before installation.

Install and Secure the Solar Array with Proper Wiring and Grounding

On a flat roof, secure solar panels without compromising the wiring beneath them. Use corrosion-resistant supports, then route cables through protected conduit with gentle bends. Avoid loose wires touching the roof membrane, sharp metal edges, or standing water. Every cable should have weather-rated insulation and enough slack for thermal movement, but not enough to form loops.

Check polarity before connecting each string. A reversed connection can damage equipment or create a dangerous fault. Keep positive and negative conductors separated where practical, and place junction boxes above possible water levels. Seal roof penetrations with compatible flashing and approved materials. Do not guess.

Ground the panel frames, support rails, and metal enclosures with continuous bonding conductors. Use listed grounding hardware and follow the current local electrical code, including requirements for grounding electrodes and surge protection. The grounding path must remain secure after wind, rain, and temperature changes. A licensed electrician should test continuity, insulation resistance, polarity, and shutdown functions before energizing the array. I would also photograph every connection before closing the conduit; small errors become difficult to find later. Even careful installers can miss a loose terminal or an unbonded rail. Final torque checks, clear circuit labels, and a dry-run inspection often prevent expensive problems.

Test the System and Plan Ongoing Roof and Equipment Maintenance

After installation, test the array before accepting the work. A qualified electrician should verify polarity, insulation resistance, grounding, and string voltage. Compare each string’s readings with the design documents. Unexpected differences may indicate a loose connector or shading problem. Check inverter alerts and export a baseline report.

Use thermal imaging and an IV-curve test when conditions allow. These tests can reveal hot connections, damaged cells, or weak strings that normal monitoring may miss. NREL’s analysis of roughly 2,000 photovoltaic systems found a median degradation rate near 0.5% per year. A baseline makes gradual performance loss easier to separate from sudden faults. I once treated a small output drop as seasonal. It was not.

Create a roof-and-equipment maintenance log. Inspect drains, flashing, ballast, cable supports, and waterproof membranes at least twice yearly, especially after severe weather. Keep leaves away from drainage paths. Do not drag tools across the roof surface. IEA PVPS Task 13 identifies moisture ingress, connection faults, and mounting problems as recurring photovoltaic failure risks. Record photographs, inverter readings, weather conditions, and repairs after every visit. Recheck roof penetrations carefully; a system can produce electricity while silently creating a leak. Have a roofing professional assess membrane condition, and have electrical work performed by a qualified person. Do not assume the original installation remains perfect.

FAQS

What should be checked before installing solar panels on a flat roof?

Inspect the roof age, membrane, drainage, hidden damage, and load capacity. A structural engineer should confirm safe support.

Can a flat roof support a solar array?

Maybe. Panels, frames, ballast, snow, and wind add weight or force. Do not guess. Get a written structural review.

How can sunlight potential be estimated accurately?

Measure usable roof space and seasonal shadows from trees, buildings, and roof edges. Bright midday light can be misleading.

Which permits may be required in 2026?

Local authorities may require building permits, electrical permits, structural drawings, site plans, and equipment details. Requirements vary nearby.

What electrical requirements deserve attention?

Check conductor sizing, grounding, overcurrent protection, labels, disconnects, and emergency access. Utility approval may also be necessary.

Are ballasted mounting systems always safer?

No. They avoid roof penetrations but add dead load and may increase wind-uplift demands. The roof structure must be reviewed.

When are mechanically attached systems suitable?

They can reduce ballast, but each penetration needs compatible flashing and documented waterproofing. Poor sealing can cause leaks.

How can the roof membrane be protected during installation?

Use approved protection layers, walk pads, and separated hardware. Keep sharp edges away from the membrane and drains.

What safety practices should workers follow?

Use approved fall protection and secure tools during windy conditions. Never rely on loose boards or improvised ladders.

What should happen after installation?

Inspect wiring, water entry, loose connections, flashing, and emergency pathways. A second inspection may reveal overlooked hazards.

Conclusion

Installing solar panels on a flat roof safely requires careful planning, structural review, and attention to current requirements. Start by checking whether the roof can support the added weight, identifying drainage paths, evaluating sunlight exposure, and noting hazards such as weak surfaces, wind exposure, and nearby electrical equipment. The question “How to install solar panels on a flat roof safely?” should be answered by following the latest 2026 permit procedures, building codes, fire-safety rules, and electrical requirements in your area. Qualified professionals should review the design before work begins.

Choose a mounting system that suits the roof structure and local weather conditions, while protecting the waterproof membrane from punctures, excessive pressure, and water buildup. Position and secure the panels carefully, route cables neatly, and complete grounding and electrical connections according to approved standards. After installation, test system performance, inspect all connections, confirm safe shutdown functions, and create a maintenance plan covering roof drainage, seals, mounting hardware, wiring, and panel condition. Regular inspections help preserve both energy output and roof integrity.

Ethan

Ethan

Ethan is a seasoned marketing professional with a deep expertise in our company's innovative product line. With a passion for sharing knowledge and insights, he takes the lead in regularly updating our corporate blog, where he explores industry trends, product features, and effective marketing......